New To Calligraphy Flourishing? Here Are 3 Tips To Make It Easier.
- Flourishing
- 0 comments
Learning flourishing is a natural progression after learning calligraphy.
It’s amazing how adding simple lines and curves can immediately make your calligraphy more polished. And when you get to intricate flourishes that create frames and interesting layouts? It’s a whole new level of artistic beauty! Flourishes are what differentiates calligraphy from computer fonts.
But before you start learning calligraphy flourishing, here are three tips:
Warm Up for Smooth Flourishing;
Practise Flourishing with a Pencil to Build Muscle Memory; and
Get the Rules and Principles of Flourishing Down Pat.
These tips will make it easier to level up your calligraphy into beautifully flourished pieces!
Warm Up for Smooth Flourishing
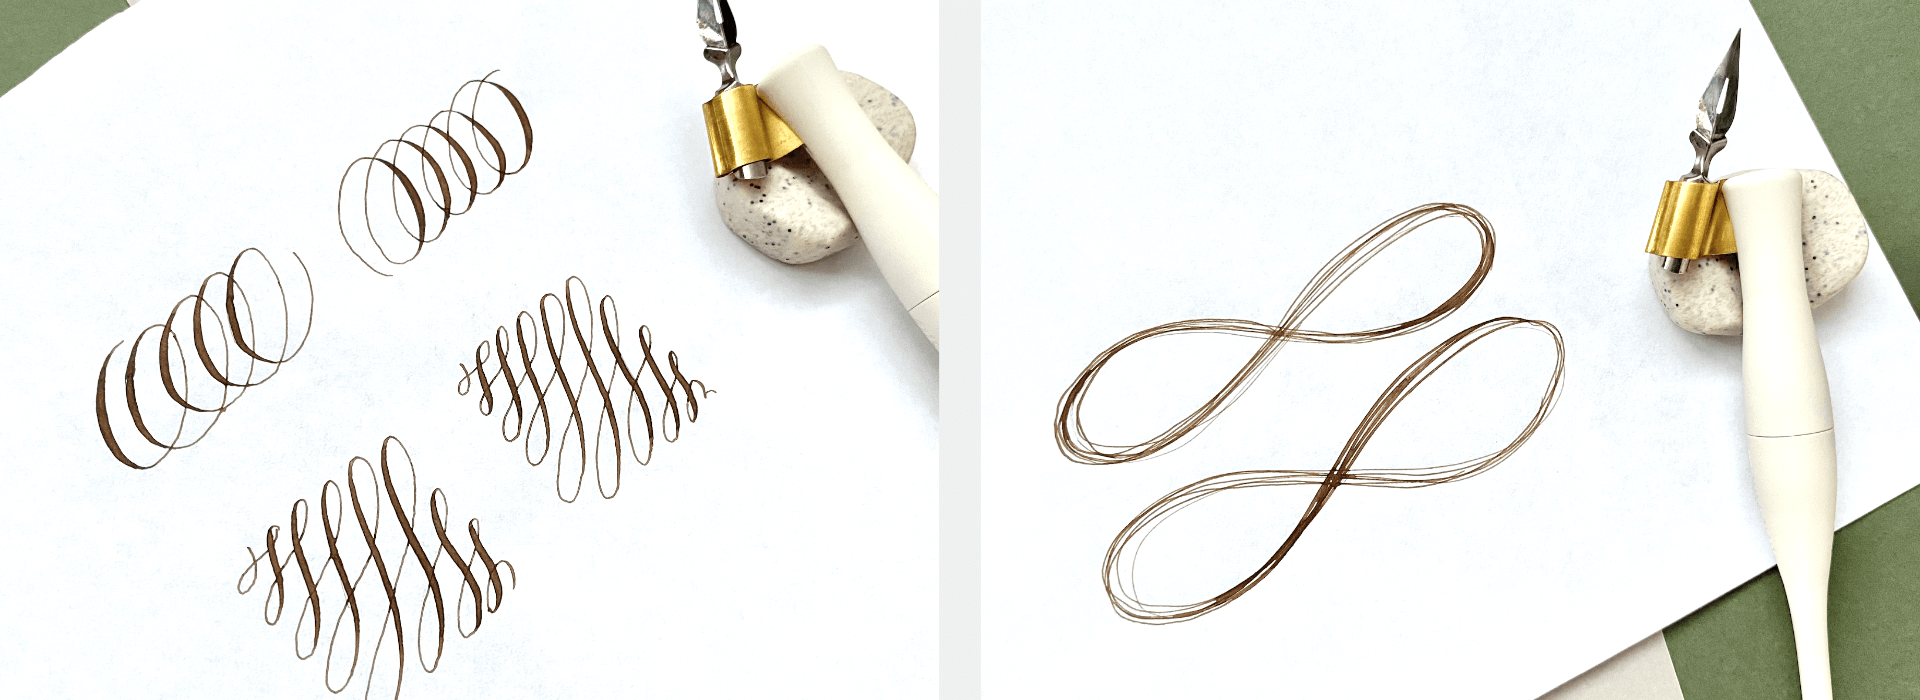
Warm-ups are important for calligraphy, but especially so for flourishing.
Most of the time, the fingers’ range of motion is too small to create flourishes. So flourishing requires shifting from finger movement to forearm movement (or even whole arm movement) without lifting the nib. With larger flourishes, it’s even harder to create a smooth line in a single action.
To maintain a smooth range of motion, warm-ups are crucial.
Practise drawing continuous ovals in both clockwise and counter-clockwise direction, as flourishes can go both ways. Or draw large ovals and infinity loops that fill up the width of an A4 paper. If you want some guidance, you can download free worksheets for these drills here!
Practise Flourishing with a Pencil to Build Muscle Memory

If you’re new to such drills, start with a pencil or any monoline tools (like gel and ballpoint pens).
Children learn how to ride a tricycle before moving on to a bicycle. So start with something simple and easy to grasp, then take off the training wheels.
By using pencils or something that you’re familiar with, it’s easier to focus on smooth arm movement. This way, you don’t have to deal with the challenge of ink skipping or nibs catching on paper. Move on to pointed pen nibs only when you feel ready.
The same applies to practising flourishing!
When learning and practising flourishing variations, start with a pencil. You can focus on the flourishes’ shapes, sizes and directions without other distractions. Even with just a pencil, you’re building muscle memory as you practise and study how to create them.
Pointed pen flourishing will be much easier once you have the basics in your brain. Speaking of basics…
Get the Rules and Principles of Flourishing Down Pat
I can’t emphasise enough how important it is to learn the basic rules and principles of flourishing.
In school, you learn the periodic table before stepping into the chemistry lab. So learn the theory, then put it into practice.
There are four basic rules and principles to creating elegant and harmonious flourishes.

Avoid crossing shades with shades.

Create ovals with your flourishes, instead of circles.
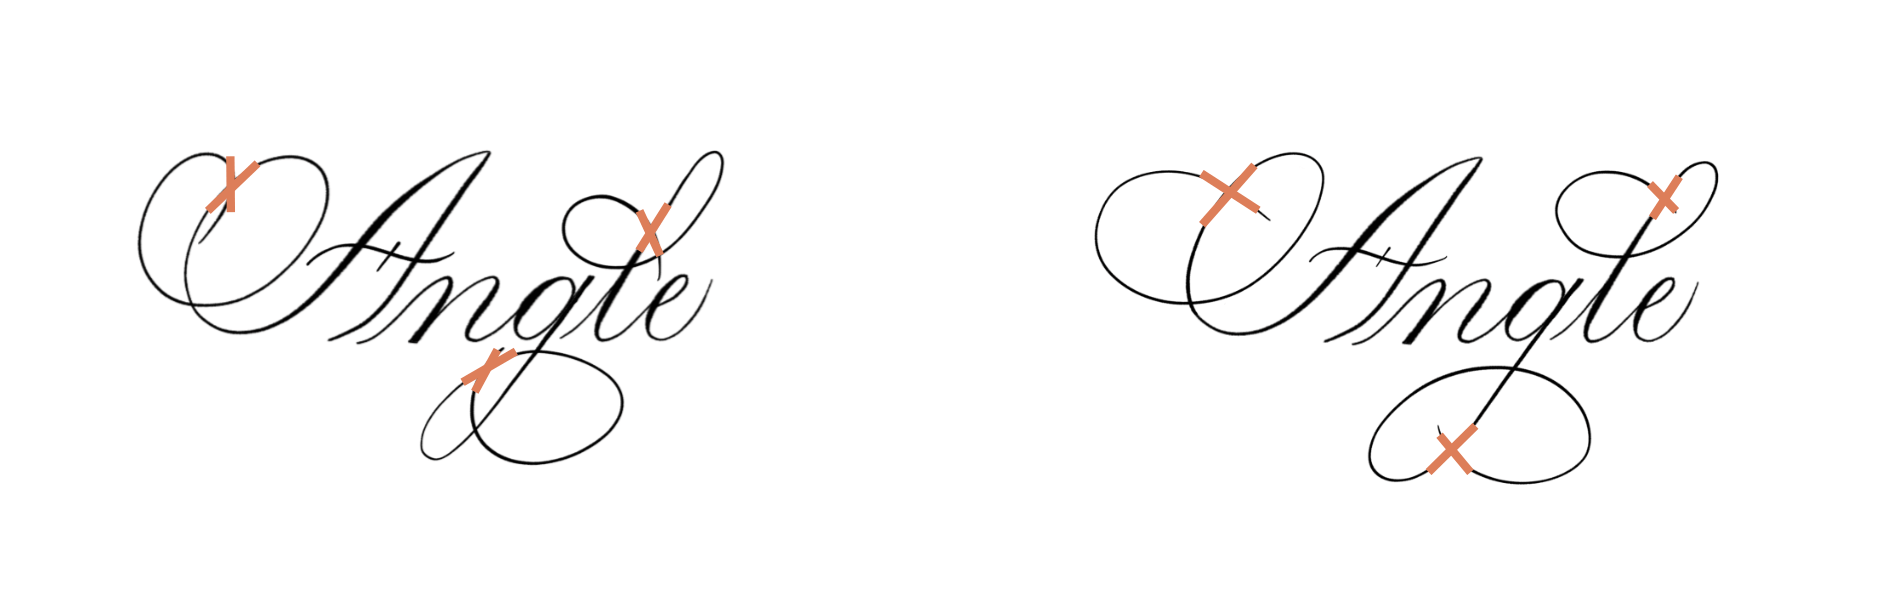
Cross lines at 90°.
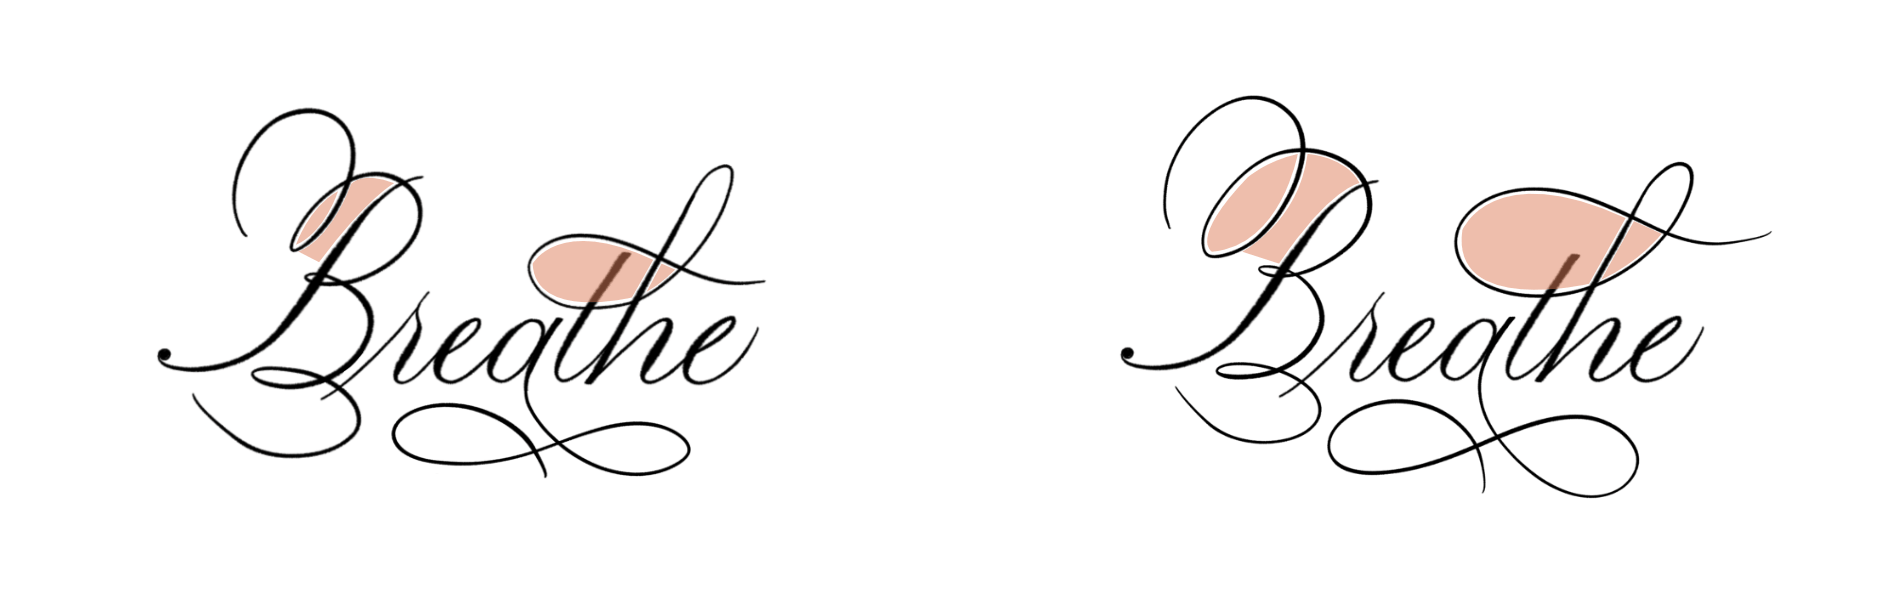
Look at negative space.
In this blogpost, I explain the basic rules in more detail. I’ve also included examples from my beginner days of learning flourishing, so it’s easier for you to understand how these rules should be applied!
Recap
Remember, here are my three tips to help you get started with calligraphy flourishing:
Warm Up for Smooth Flourishing;
Practise Flourishing with a Pencil to Build Muscle Memory; and
Get the Rules and Principles of Flourishing Down Pat.
Now go forth and flourish!
→ hey there
I’m Dawn from Singapore.
After leaving a corporate job in the throes of the pandemic, calligraphy has given me more than a hobby and a creative outlet.
Calligraphy challenges me to keep learning, helps me to calm down and focus, and has connected me to so many calligrafriends around the world.
Drop me an email at any time if you have questions / problems while learning calligraphy, or just want to chat about calligraphy! ♥️